Clonezilla images
Clonezilla disk images
v21.12.15This procedure covers how to make and restore disk image copies from physical machines to local usb devices, with partition and disk imaging/cloning program Clonezilla.
For more information see: https://clonezilla.org/
Prerequisites
- Download Clonezilla .iso file from https://clonezilla.org/downloads.php
- Generate Clonezilla USB boot flash disk from .iso file (Use balenaEtcher software in MacOS)
- External USB disk with enough capacity for disk images
Set-up Clonezilla Imaging environment
Boot from Clonezilla USB
Plug Clonezilla USB boot flash disk into the machine
Connect
IPMIinterface to your networkLogin to IPMI
Start a remote console: In Remote Control -> iKVM/HTML5 start a remote console
Open virtual keyboard: If necessary, open a virtual keyboard pressing the button down left
Start the machine: Execute Power Control -> Set Power On to start the machine
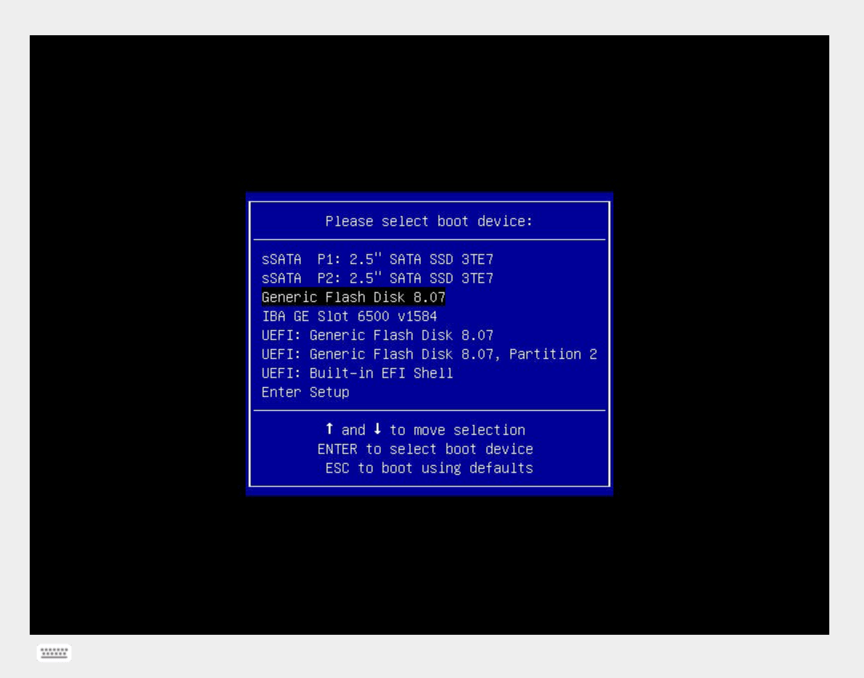
Enter in Boot Menu: Press
<F11>to invoke Boot Menu when promptedSelect Flash disk boot device and boot the machine
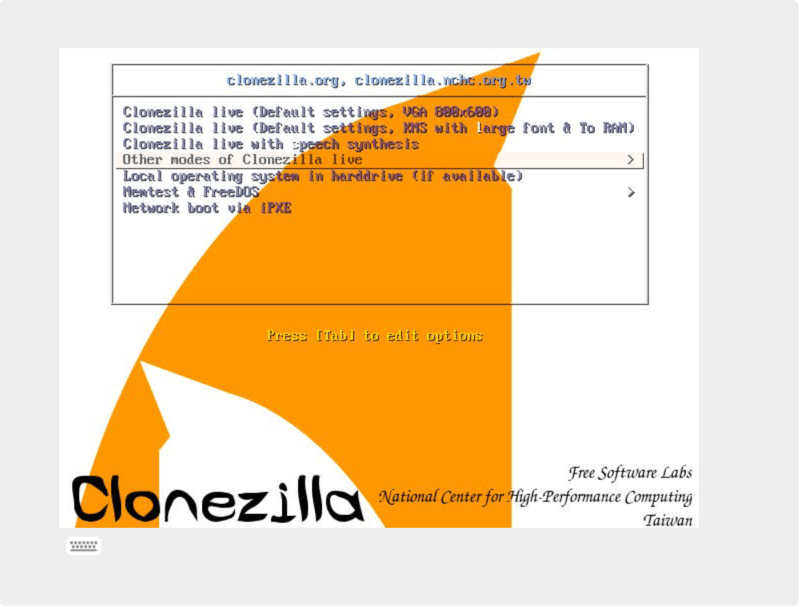
Select Other modes of Clonezilla Live
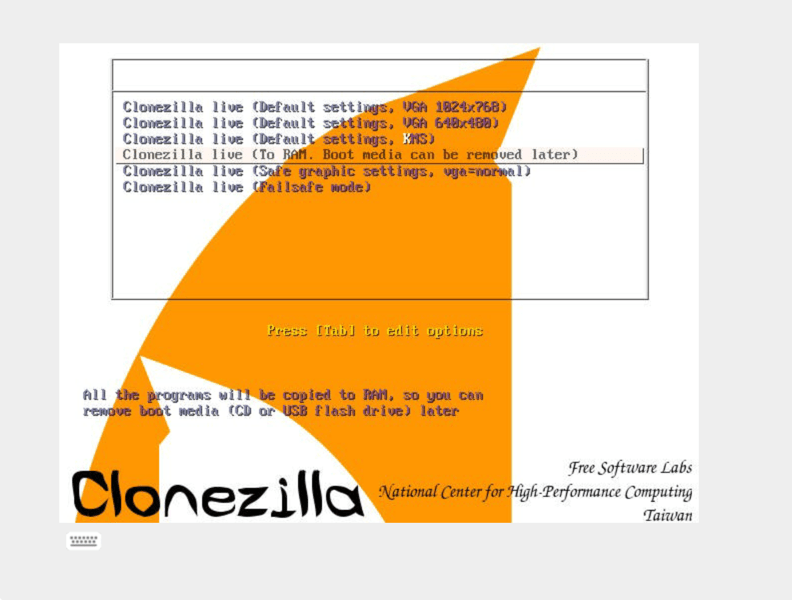
Select Clonezilla live (To RAM. Boot media can be removed later)
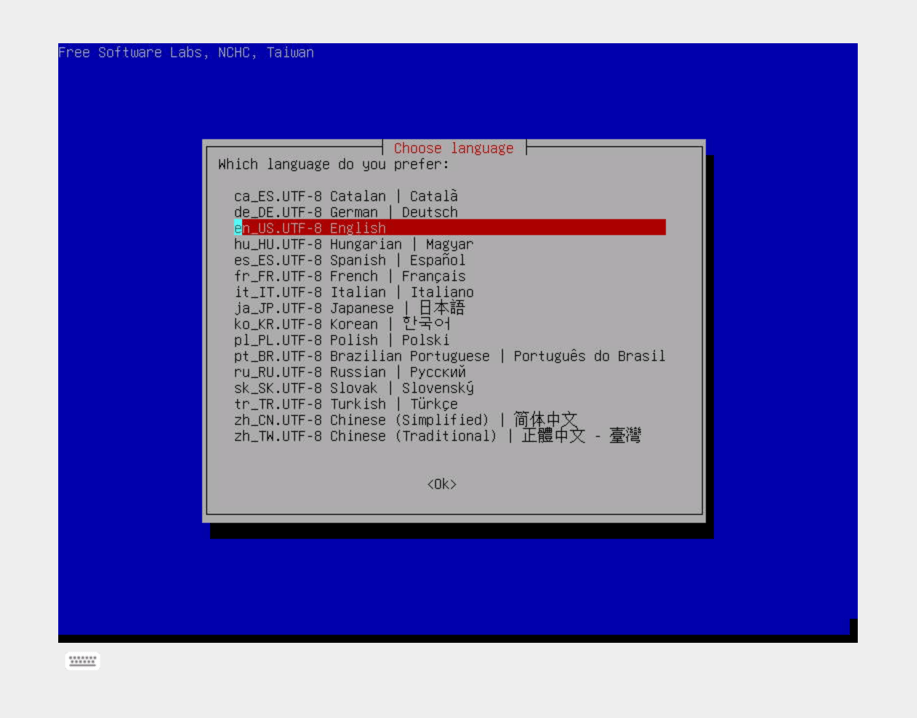
Select Select en-US as language
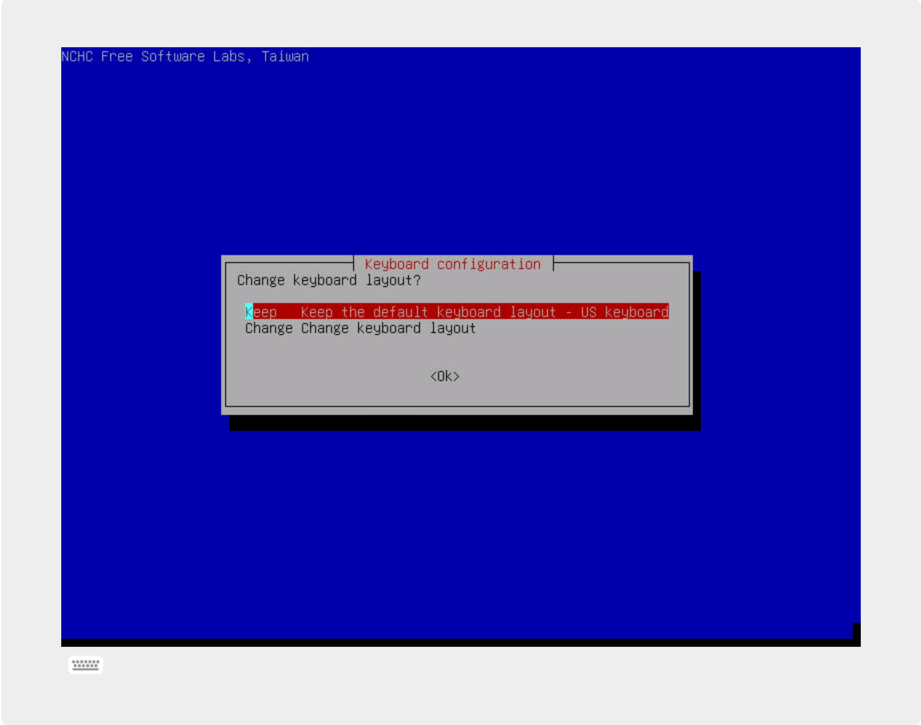
Select Accept default keyboard layout
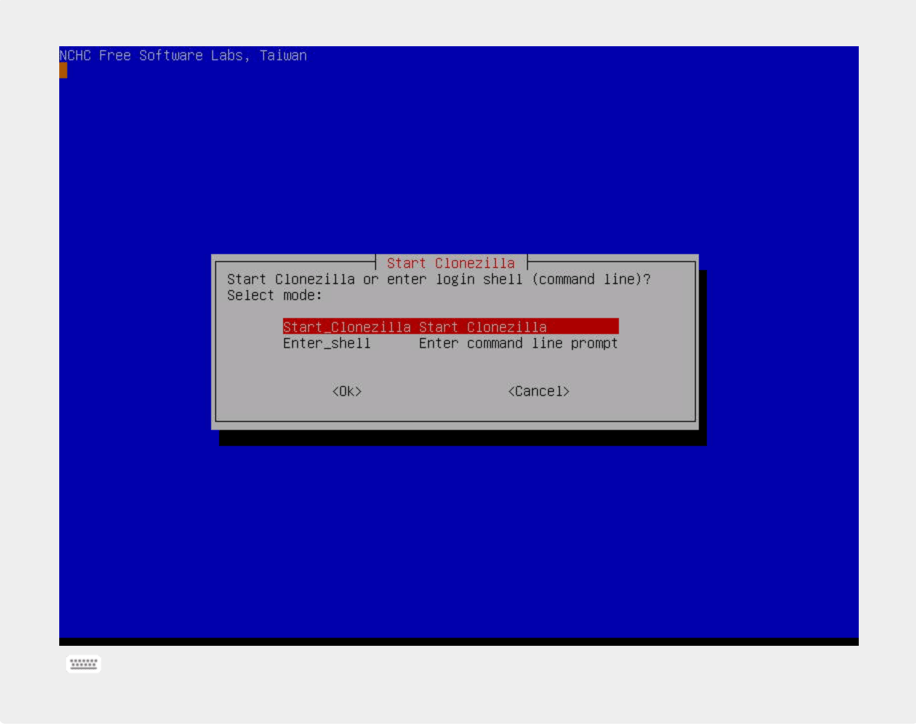
The boot process finishes in Start Clonezilla window.
NOTE:: You can unplug now the USB Clonezilla boot flash disk and plug the external USB disk with images storage.
Select device-image mode and mount local image storage
This procedure selects device-image mode and mounts local USB external disk as repository for images.
Start Clonezilla after boot procedure
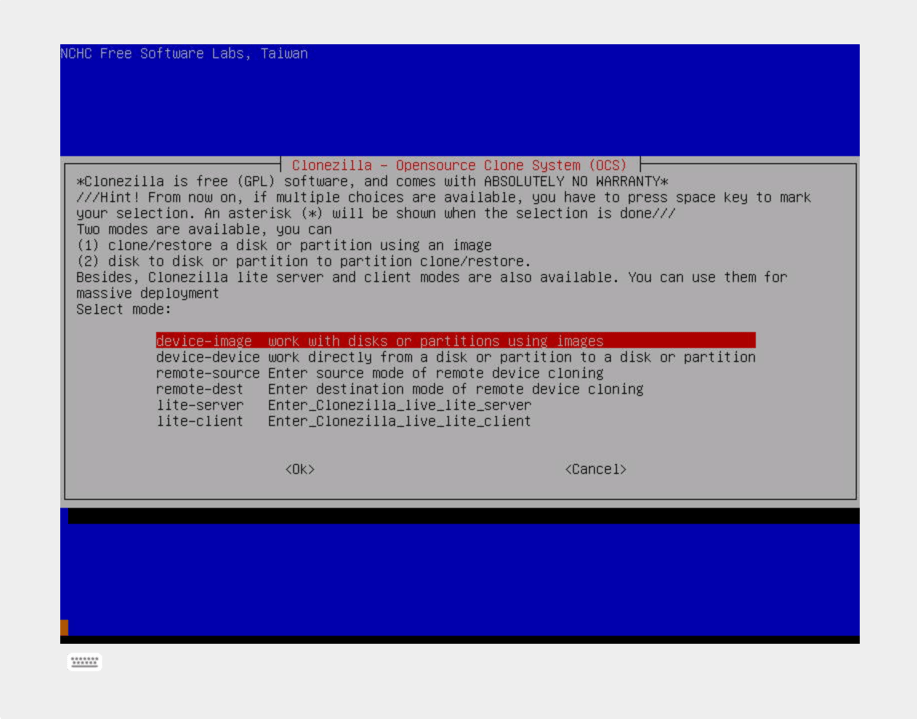
Select device-image to work with disk or partition using images
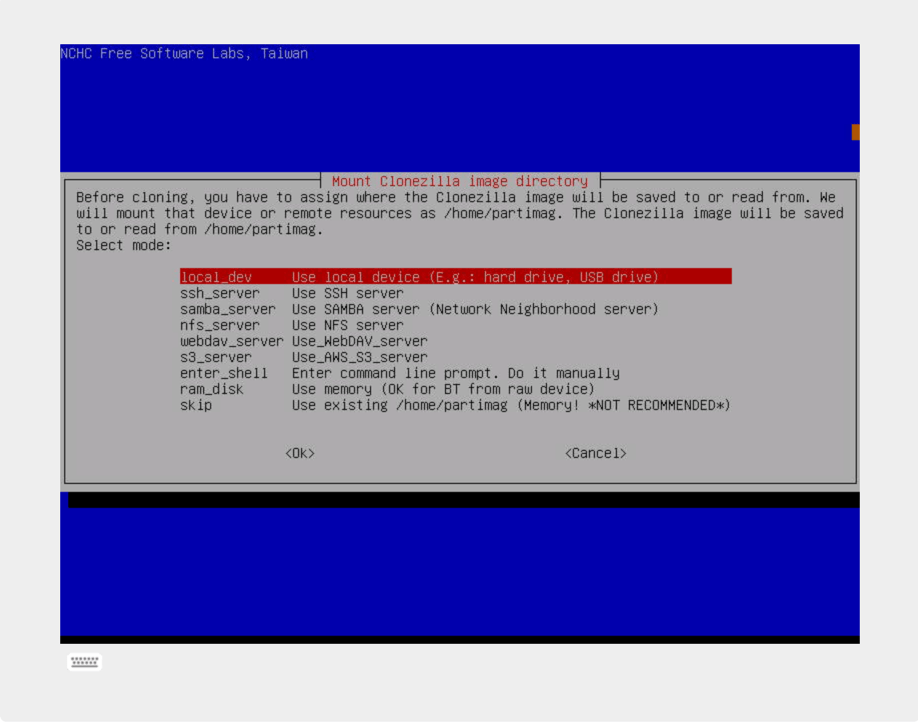
Select local_dev to use local device
Select local_dev to use local device. Wait for your device to be detected and follow instructions.
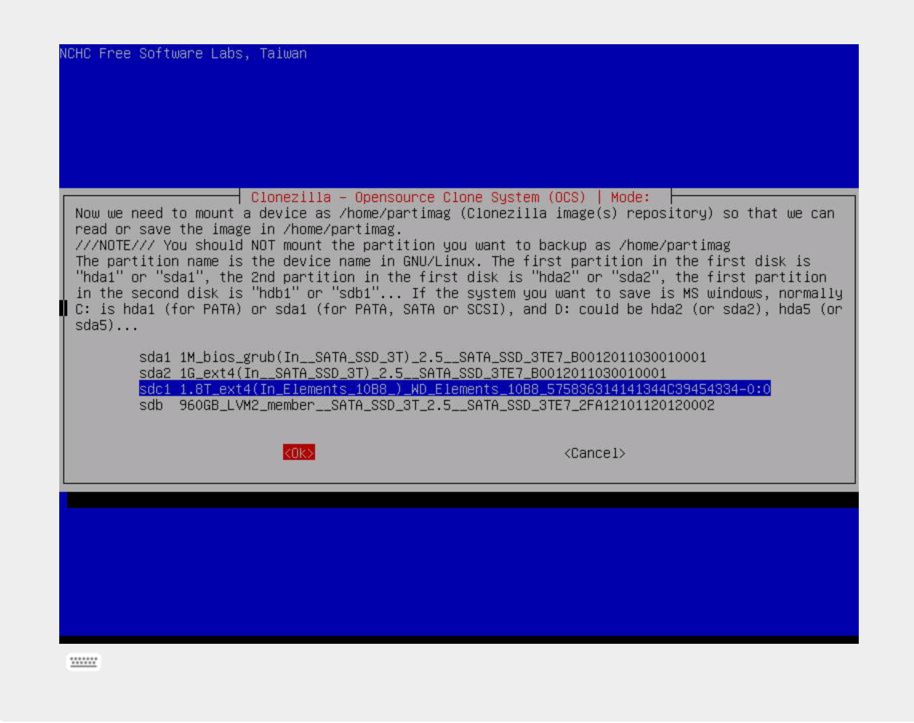
Select your external disk drive (by pressing space) to be mounted as images repository
NOTE: Be sure you do not select internal disk devices
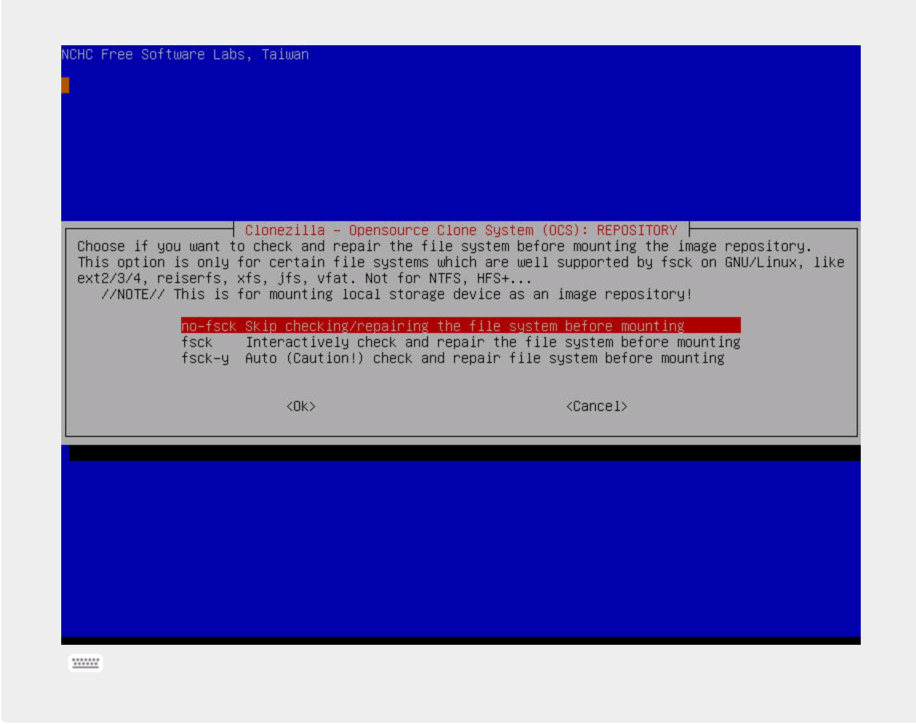
Accept no-fsck by default
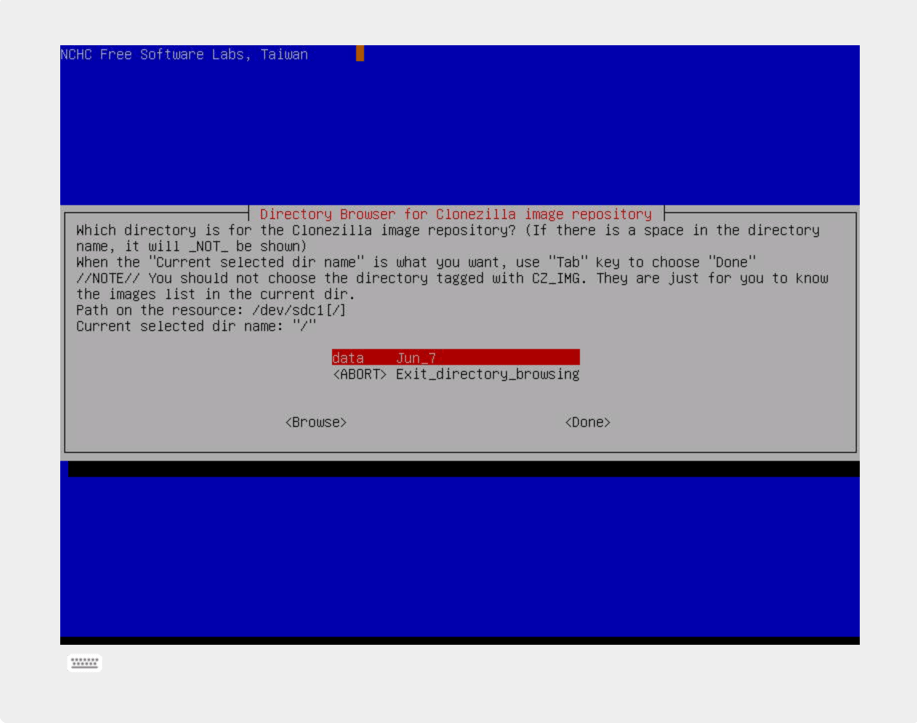
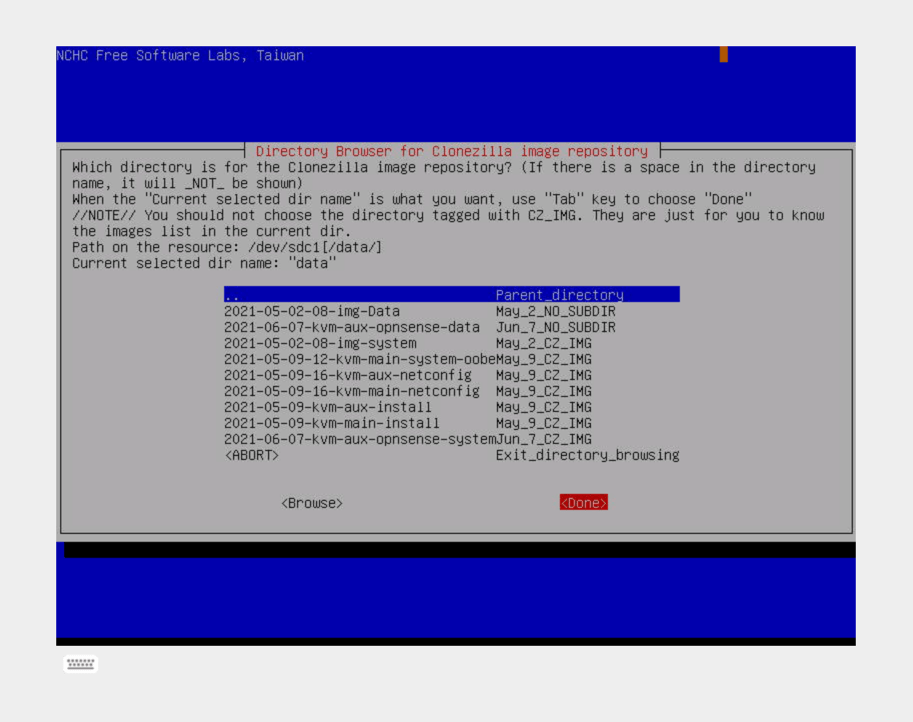
Navigate to select the directory to hold the images and continue
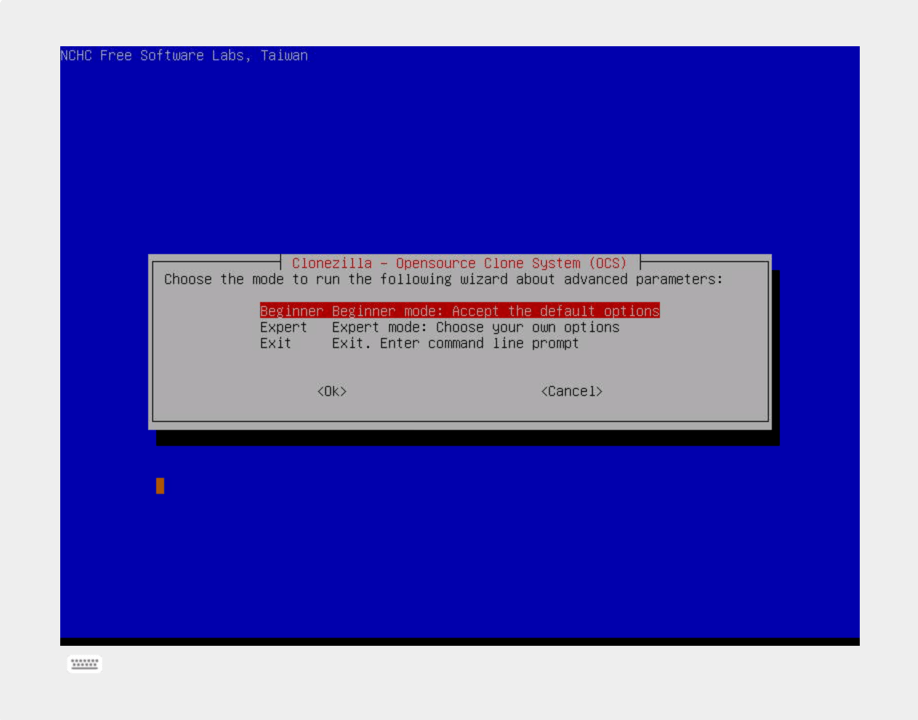
The procedure finishes with Beginner-Expert window. From here you can create or restore images from/to disks.
Create image file from disk
This procedure copies an entire internal disk as an image file in external image repository.
Start Beginner mode after Select device-image mode and mount local image storage procedure:
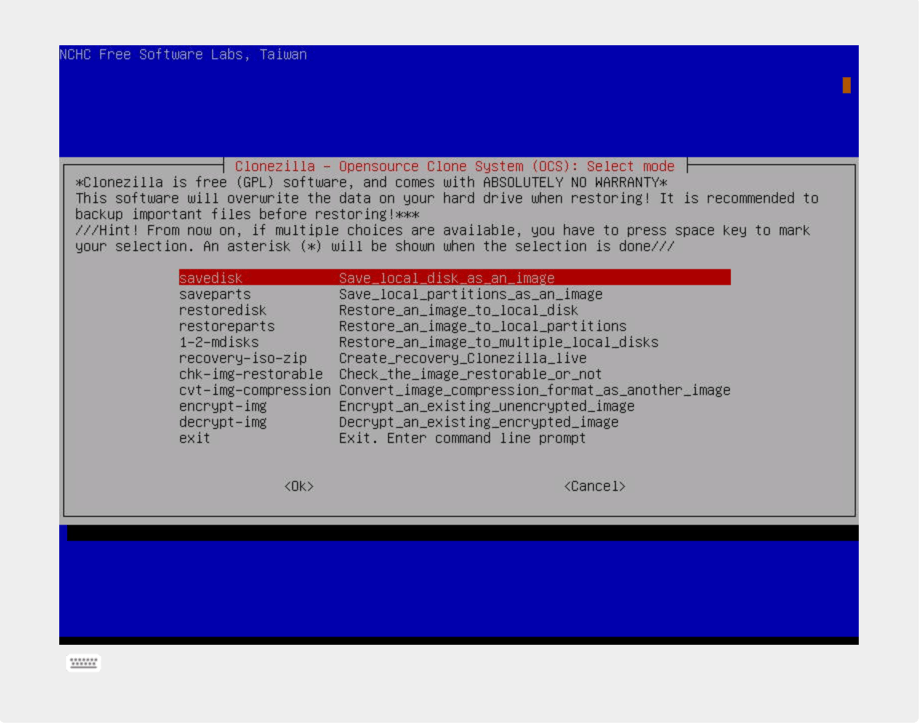
Select savedisk to save local disk as an image
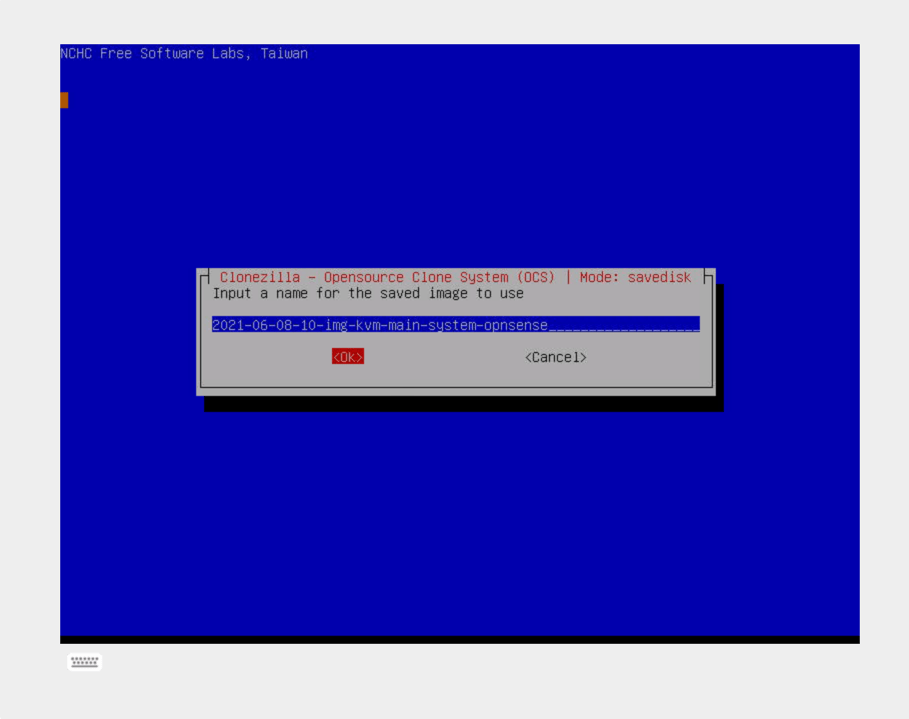
Name the disk image by adding to the date/time proposed name the following information:
- Machine name: Ex.
kvm-main - Disk name: Ex.
systemordata - Image name: Ex.
opnsensefor a specific installation phase
- Machine name: Ex.
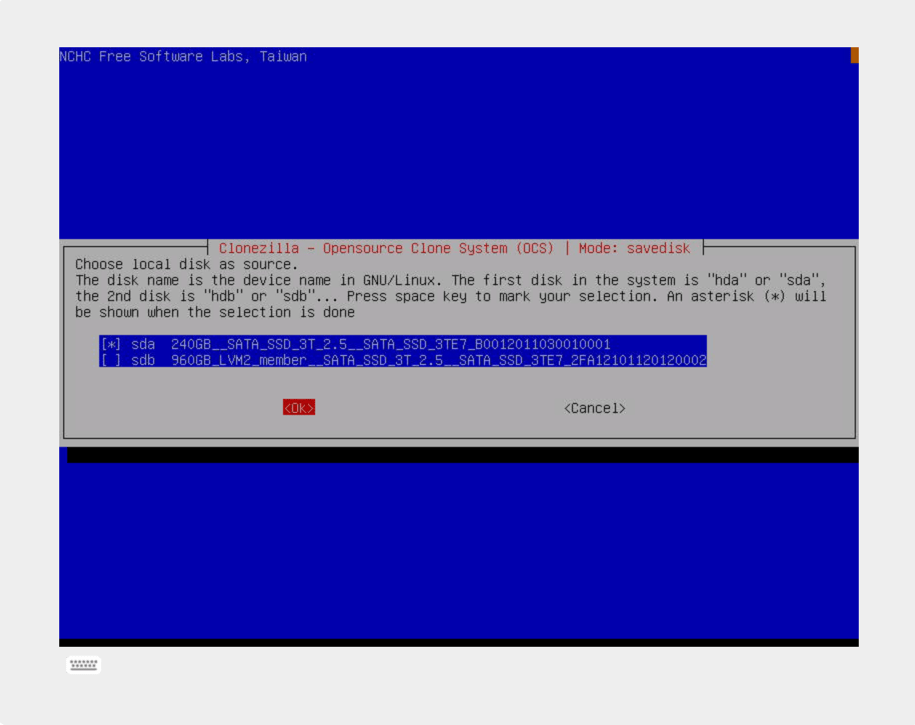
Select the internal disk to copy as an image
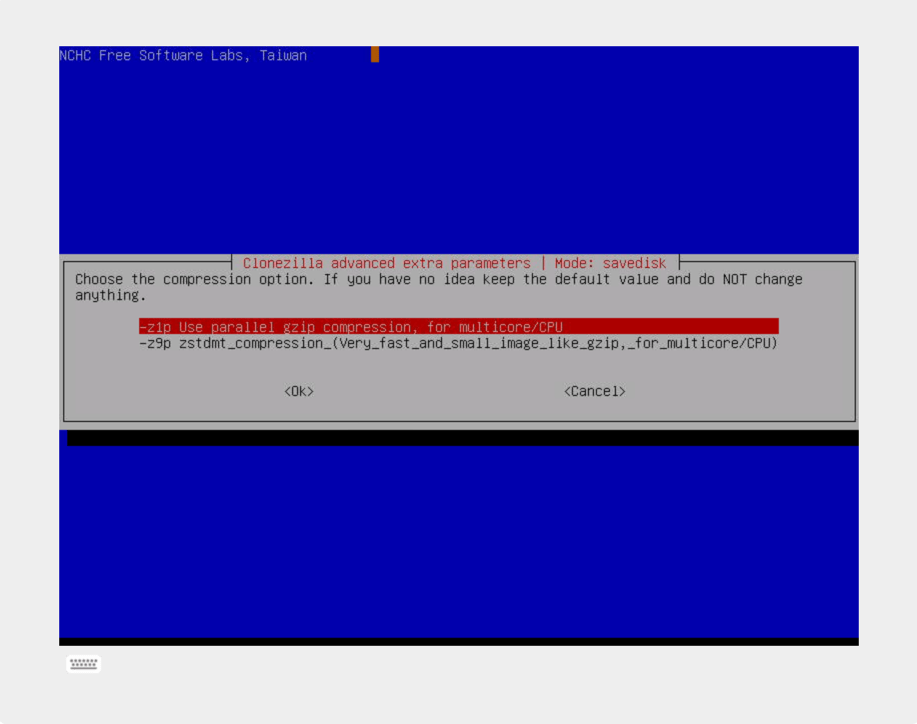
Accept default values for compression option
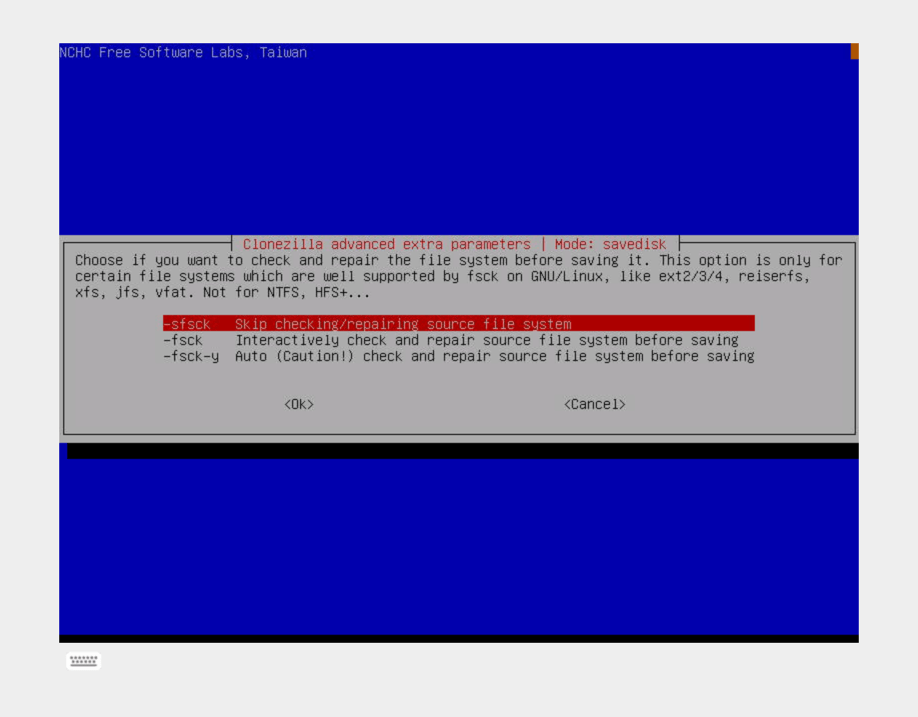
Accept default values and skip checking/repairing source file system
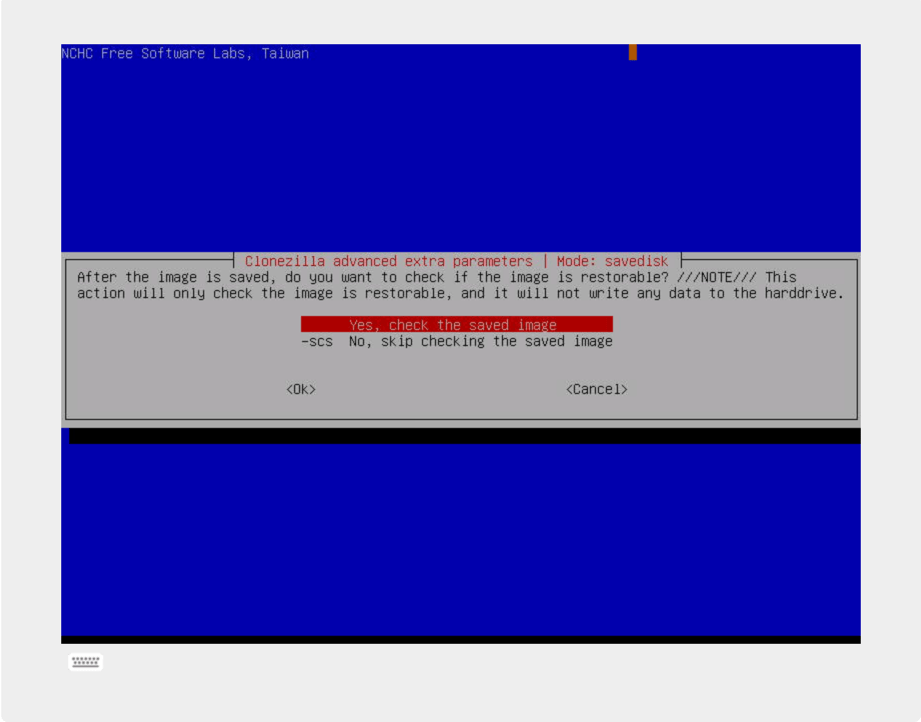
Accept default values and check image after saved
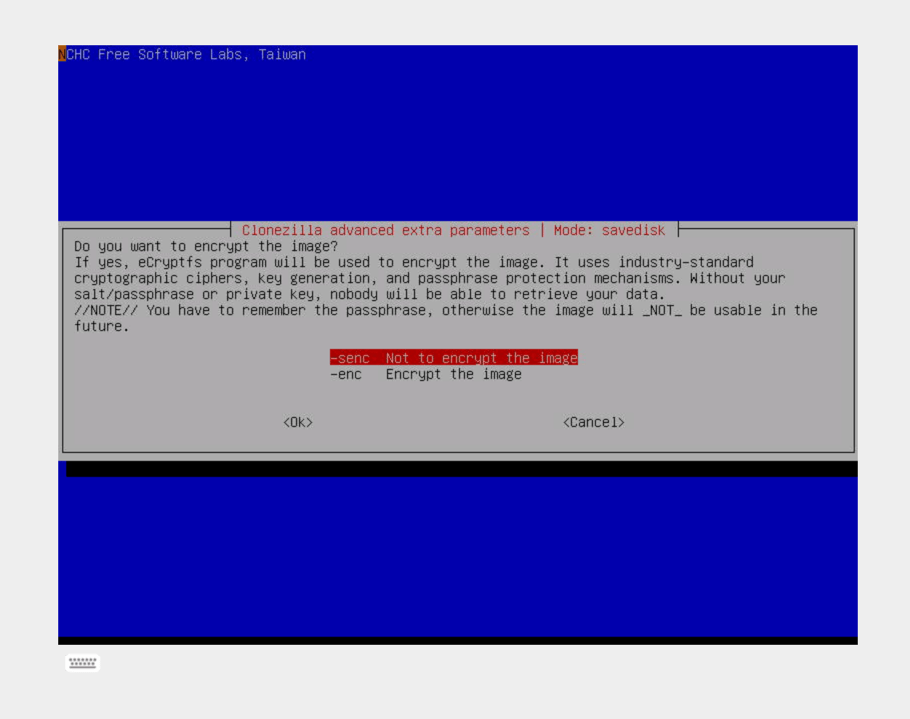
Accept default values and do not encrypt the image
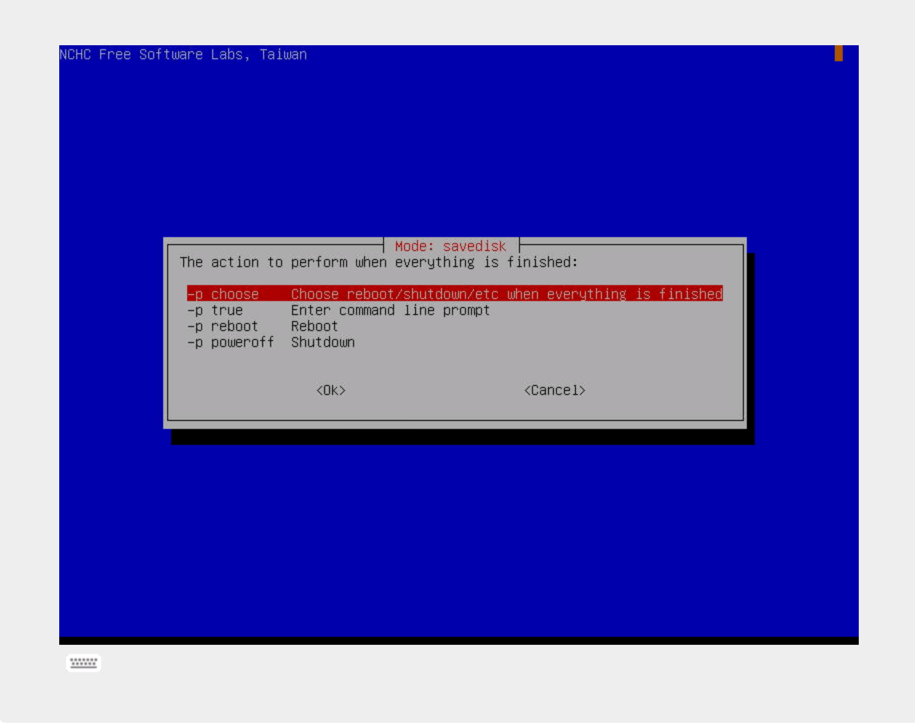
Accept default values and choose reboot/shutdown or other options when finished
Accept default values and choose reboot/shutdown or other options when finished. Follow instructions, confirm and continue.
Watch progression and wait until image is created and successfully checked.
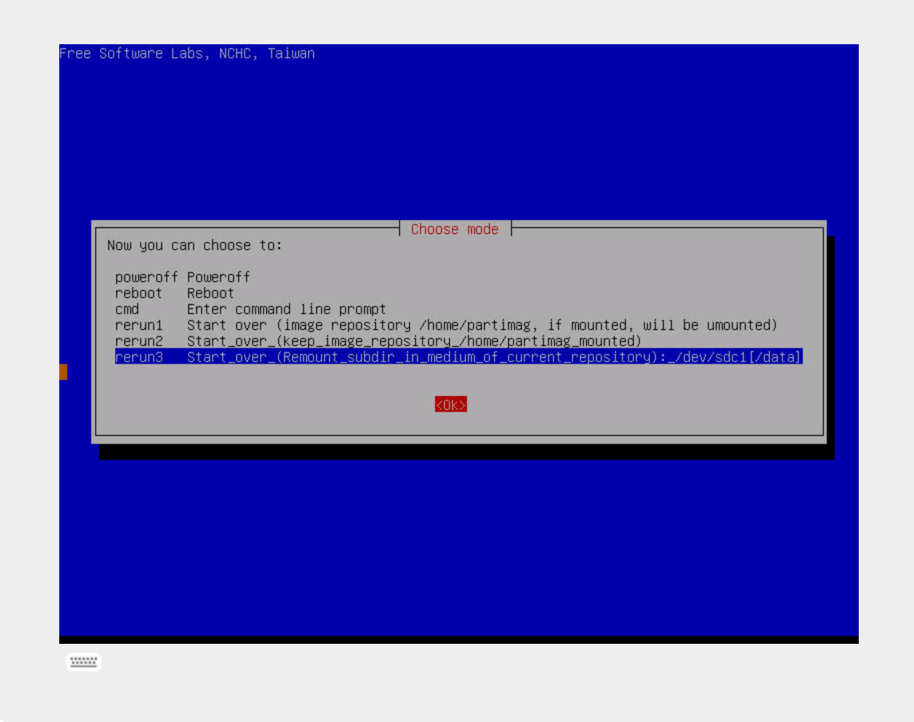
When the process finishes choose rerun3 if you want to perform other copies with the same image repository.
Restore image file to disk
This procedure restores an entire internal disk from an image file.
Start Beginner mode after Select device-image mode and mount local image storage procedure:
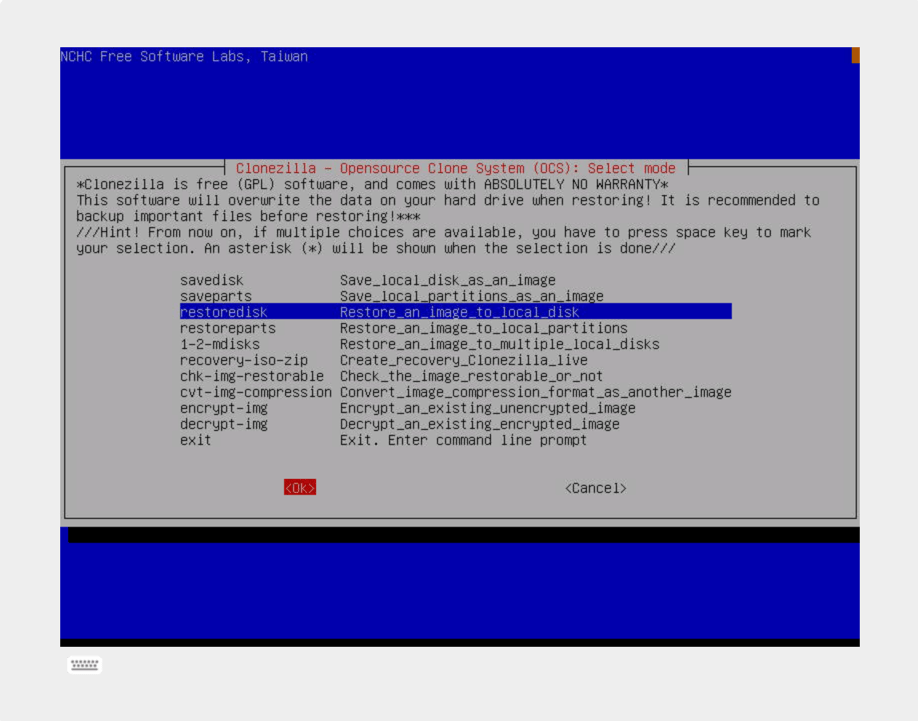
Start restoredisk to restore an image to local disk
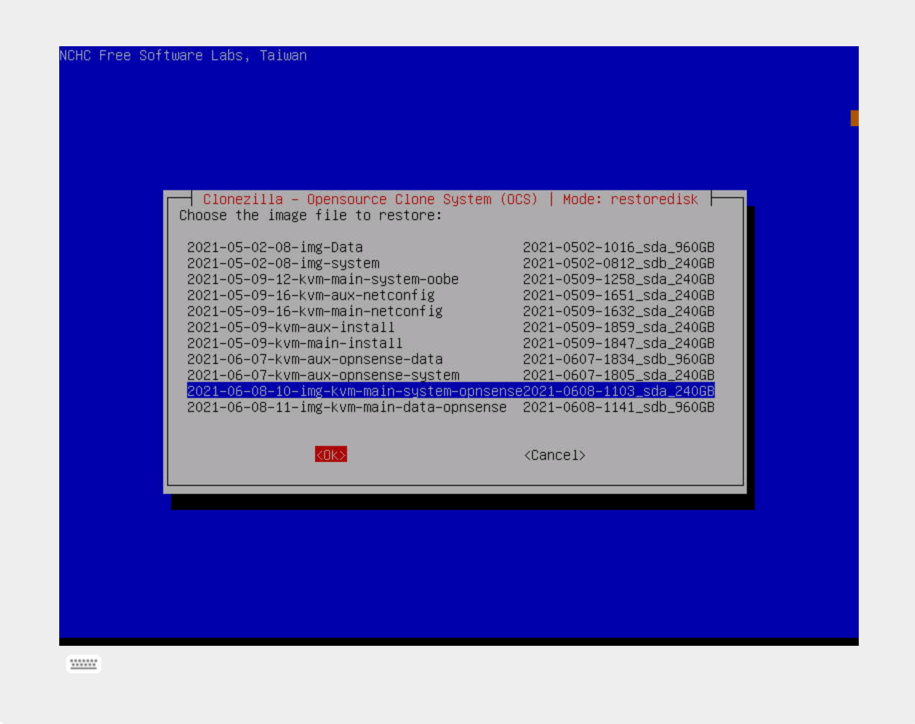
Choose the image file to restore
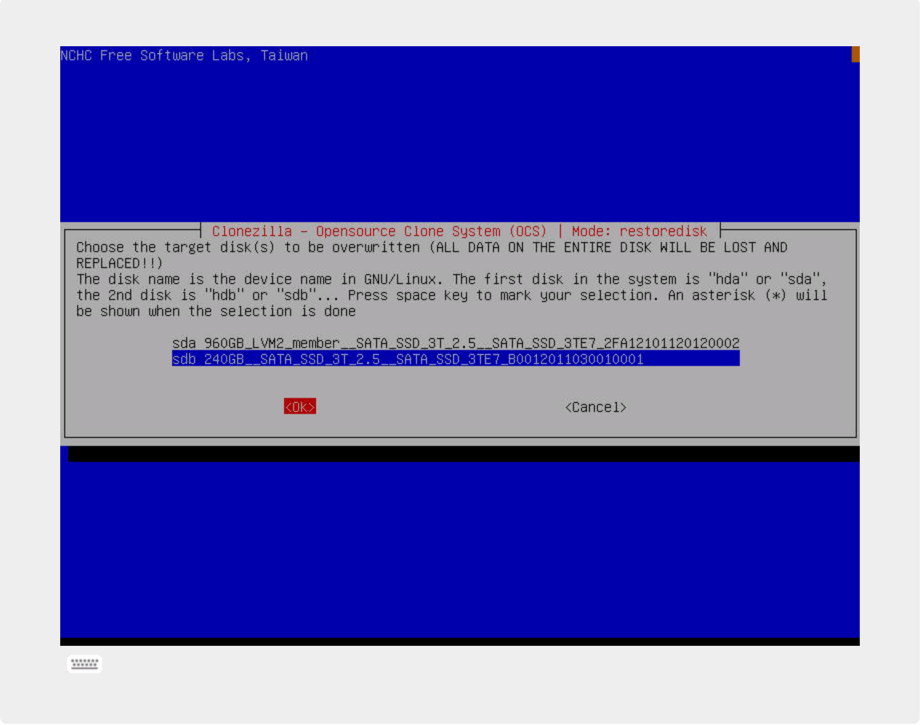
Choose the target disk
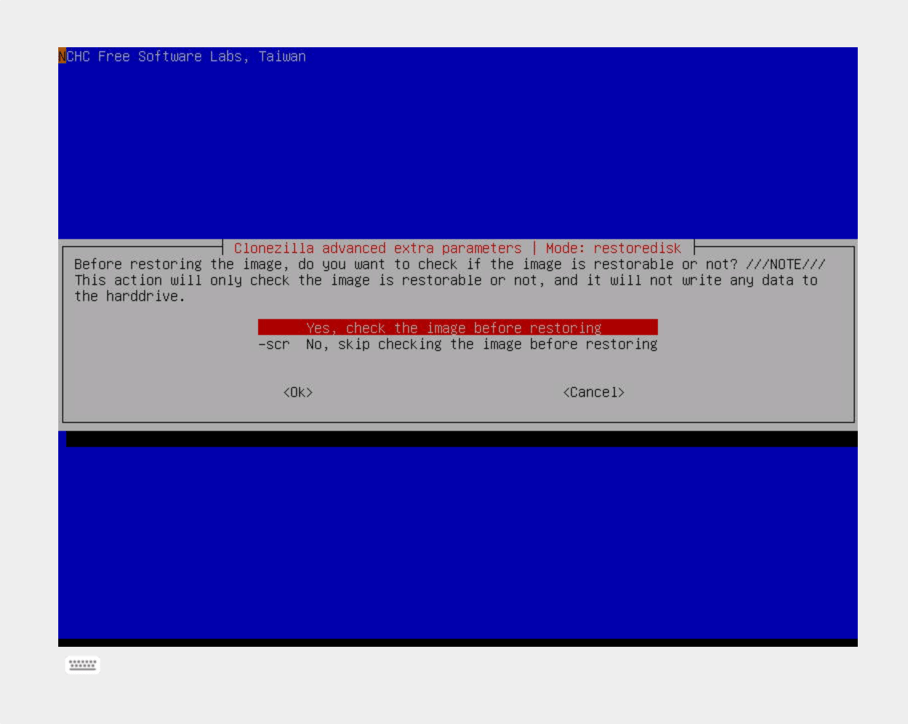
Accept default values to check image before restoring
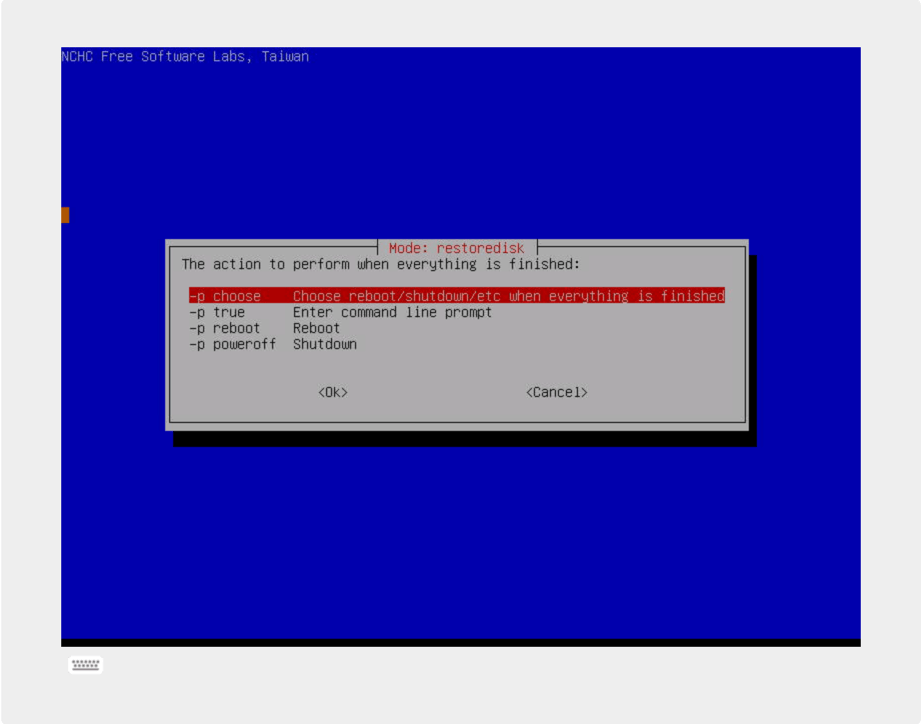
Accept default values and choose reboot/shutdown or other options when finished. Follow instructions, confirm and continue.
Watch progression and wait until image is successfully restored.
When the process finishes choose rerun3 if you want to restore other images from the same image repository.
